A git command cheat sheet with essential git workflows for daily tasks. It covers major areas encountered while using Git daily including the git stash command.
Git Command Cheat Sheet Intro
Before getting started, there are a few accounts, passwords, and programs to have on hand for the full experience.
- Create a GitHub Account or similar git user on another service
- A terminal app such as iTerm (Mac) or cmdr (Windows)
- Download and install Git
- Be sure to create a Github personal access token or learn how to connect to your Git service.
- Also, check out my Linux Commands Cheat Sheet as git and command line go hand in hand.
#1: Create A Git Repository
First up create a repo on Github or a similar service prior to executing these steps. However, if you are working on a team, you may need to contact your team lead or Git admin to create a new repo and be granted permission. Nevertheless, once it is set up, use the commands below to set up a Git repo to send your code to the Github remote repo. Special thanks to the examples posted on IQCode.
# go to the location of your script
# initialize git within your application folder
$ cd /your/folder/dir/your-script
$ git init

# add all your initial files
# make a commit with a comment
$ git add .
$ git commit -m "initial commit"

# set the offsite location where your repo is stored
# then doublecheck that your remote location set corectly
$ git remote add origin https://github.com/(YOUR GITHUB REPO PATH)
$ git remote -v

# push the local commit to your master branch
$ git push --set-upstream origin master

# create and switch to a new branch
# (DO NOT work out of the "master" branch)
# verify you are on the dev branch
$ git branch -b dev
$ git branch -a

# push that branch to the remote repo
$ git push --set-upstream origin dev
#2: Clone / Download A Repo
The second major task is downloading or cloning a git repo to your local computer. You can clone your own existing repo or one created by a third party.
# go to the location where you want to set up your script
$ cd /your/folder/dir/your-script

# clone / download the script from the remote repo
# (do not forget to add the "." at the end to download inside your folder)
$ git clone https://github.com/(YOUR GITHUB REPO PATH) .

# switch to the "dev" branch (DO NOT work on "master")
# and verify that you're on that branch
$ git checkout dev
$ git branch -a

# pull any updated code from this branch to make sure you have the latest updates
$ git pull
#3: General Git Workflow
After your Git repo is created and/or cloned, this is the bread and butter of my day-to-day use of Git. Granted there may be other git commands you need over time, but this should get you 80% of the way there.
# Fetch all changes
# Checkout master and pull the latest code
$ git fetch -a
$ git checkout master
$ git pull

# Create and switch to a new branch
$ git checkout -b new-branch

# Make changes and test locally.
# When you are ready, add files and commit changes.
# Repeat until you're ready to merge.
$ git add .
$ git commit -m "my new changes"
$ git push

# If another developer makes changes to this branch,
# then fetch all current code, stash your local changes,
# pull the most recent branch code, unstash your changes,
# and continue developing.
$ git fetch -a
$ git stash
$ git pull
$ git stash pop

# If you are ready to merge, then fetch the latest code.
# Pull the master or parent branch into the new-branch
$ git fetch -a
$ git pull orign master

# Fix any conflicts, add files again and commit up
$ git add .
$ git commit -m "conflicts fixed!"
$ git push

# continue to Github and create a pull request
# to compare code between branches and merge.
Continue to Github to create a pull request.
#4: Git Stash Command
# Save uncommited changes and reverts files to committed versions.
# Useful for pulling down an updated branch.
# Any new files (unrelated to committed files) will not be stashed.
$ git stash

# Stash all types of files (changed old files and new files).
$ git stash -u

# Check to make sure the files you are expecting are stashed.
$ git status

# Un-stash your changes and apply them back to committed files.
$ git stash pop

# Lost track of what you have stashed? List current stashes.
$ git stash list

# Delete all stashes.
$ git stash clear
Additionally, you can learn more about git stash via Bitbucket, Git documentation, and W3 Docs.
#5: Hard Reset A Branch
# fetch all updates to your local computer, but don't apply them
# go to the
$ git fetch —all
$ git checkout (your branch)

# reset your local branch to remote branch
# all changes will be discarded
$ git reset —hard origin/(your branch)
$ git pull
#6: Git Tagging
Useful for numbering versions, but especially for creating packages used in other projects, Git Tagging allows you to limit what version number you want to pull for production or within another production application.
# List current tags
$ git list

# Create an annotated tag with a message
# format:
#    git tag
#    -a (for annoted)
#    v1.4.1 (for the version number)
#    -m "my version 1.4.1" (text message for notes)
$ git tag -a v1.4.1 -m "my version 1.4.1"

# Push a single tag to the remote repo
$ git push origin v1.5

# Push all tags to the remote repo
git push origin --tags
For more info on Git Version Control see the Git Docs and W3 Docs.
About Naming / Incrementing Tags
It’s best to follow the Semantic Versioning shorthand: MAJOR.MINOR.PATCH
- MAJOR version when you make incompatible changes to a previous version.
- MINOR version when you add functionality in a backward-compatible manner.
- PATCH version when you make backward-compatible bug fixes.
For more info see semantic versioning.
#7: Change Branch Name
# swith to the branch you want to rename
# and change the name
$ git checkout old_branch_name
$ git branch -m "new_branch_name"

# push the branch to the remote repo
# and set your local branch to be connected to the new remote branch name
$ git push origin :"old_branch_name" "new_branch_name"
$ git push origin -u "new_branch_name"
Thanks to Dev Connected’s “How to Change a Branch Name on Git“.
Git Command Cheat Sheet: Bonus Round
| Action | Command |
| Pull from a branch from the server | git pull origin (branch) |
| View status of uncommitted changes | git status |
| Prep all recent changes for a commit | git add . |
| Prep one file to a commit | git add (path/to/the/file/filename) |
| Commit changes with a comment | git commit -m "my commit message" |
| Push committed changes to the repository | git push |
| Show all branches | git branch -a |
| Create a new branch | git branch (new-branch-name) |
| Switch to another branch | git checkout (branch-name) |
| Create a sub-branch | git checkout -b (sub-branch) (original-branch) git push origin (sub-branch) |
More Git Cheat Sheet Resources
To sum up, this is by no means the end of git command cheat sheet references you’ll need over time. Specifically, here are some great ones:
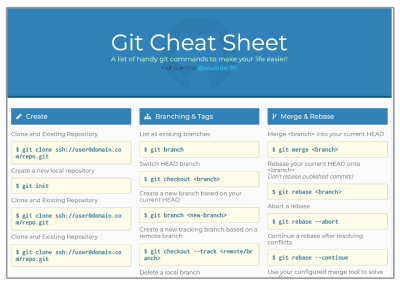
- An awesome one-page Git Cheat Sheet
- Github Tutorial For Beginners on YouTube: Part 1 and Part 2
- GitLab Git Cheat Sheet PDF
- Learn Git with Atlassian
Finally, If you know of any other tips to include in this git command cheat sheet, let me know in the comments below.