
This Laravel React install/integration tutorial combines the two frameworks with Laravel Sail, Docker, and Laravel Mix. It will take you from creation to deployment. Also, we use Laravel Sail for our local dev environment.
By the end of this guide, we will have a basic project that…
- Integrates Laravel React via Laravel Mix
- Uses Laravel Sail to launch a docker dev environment on our local computer
- Is pushed to an external repository using Github
- And deployed on a production hosting environment.

Laravel React Prerequisites
This tutorial requires some knowledge of PHP and Javascript.
It requires no prior knowledge of React or Laravel.
However, it would be best if you did have some experience with React and Laravel. This guide focuses on integration between the two. Other tutorials cover each individually.
- Getting Started With React (free react 18 tutorial)
- Laravel Tutorial on Udemy (paid)
But again, no prior knowledge of the frameworks is required.
Prep Your Computer for Laravel React
Now let’s kick things off by getting our computers ready. These are the apps we’ll need before we install React and Laravel.
Download And Install The Following:
- Docker – this will load our Laravel React docker via Laravel Sail
- Node.js
- Git
- iTerm or the terminal/command line app of your choice.
- Microsoft VS Code or Sublime Text or your favorite IDE.
– VS Code has a number of helpful plugins and a built-in Terminal. - Cyberduck or any FTP client.
- Sequel Ace or a MySQL management app that supports MySQL 8.
Optional Visual Studio Code Plugins
Below are helpful extensions that will make our programming easier. If you need help, view this video on How to Install Extensions.
- ES7+ React/Redux/React-Native snippets – helpful React syntax
- Auto Comment Next Line – makes commenting code easier
- Duplicate action – adds the feature to duplicate files within VS Code
- Prettier – Code formatted – this keeps code organized & formatted
- Babel JavaScript – JS syntax highlighting
- PHP Intelephense – PHP code completion
Docker Set-Up:
Fix Mac Memory Usage Issue
(Before It’s a Problem)
This is optional, but it may prevent a Docker mac memory usage issue that slows down your computer and hogs memory. Thus helping your React Laravel docker run smoothly.
- Open the Docker Dashboard.
- Click on the upper-right gear icon for preferences.
- Within preferences, select “Resources”.
- Select a lower amount of “CPUs” and “Memory”.
– Play around with this for the right outcome.
– I lowered mine down to “CPUs: 2” and from 8GB to 2GB of memory.
- In the bottom right, click the “Apply & Restart” button.
- Close the Docker Dashboard.
On a personal note, I had Docker installed on my Macbook for years with high memory usage and the fan blowing all the time before I realized this issue and how to resolve it.

Laravel React Hosting
In this tutorial, we will deploy our project in an external hosting environment. This is optional, but if you want to follow along, use your own hosting account. Here are a few I’ve had luck with:
The host must comply with the Laravel Deployment server requirements such as PHP 8.0+.
Install Laravel 9
Within a terminal app, navigate to a folder you’d like to create your app in. Then follow the Laravel installation steps summarized below. This utilizes Laravel Sail to run our app within a docker.
cd /MyFolder/MyProjects/
curl -s "https://laravel.build/react-laravel" | bash
# it will run for a while and may ask for your computer's password
cd react-laravel
./vendor/bin/sail up
# it will run for a while again.
# then the terminal window will continue outputting activity
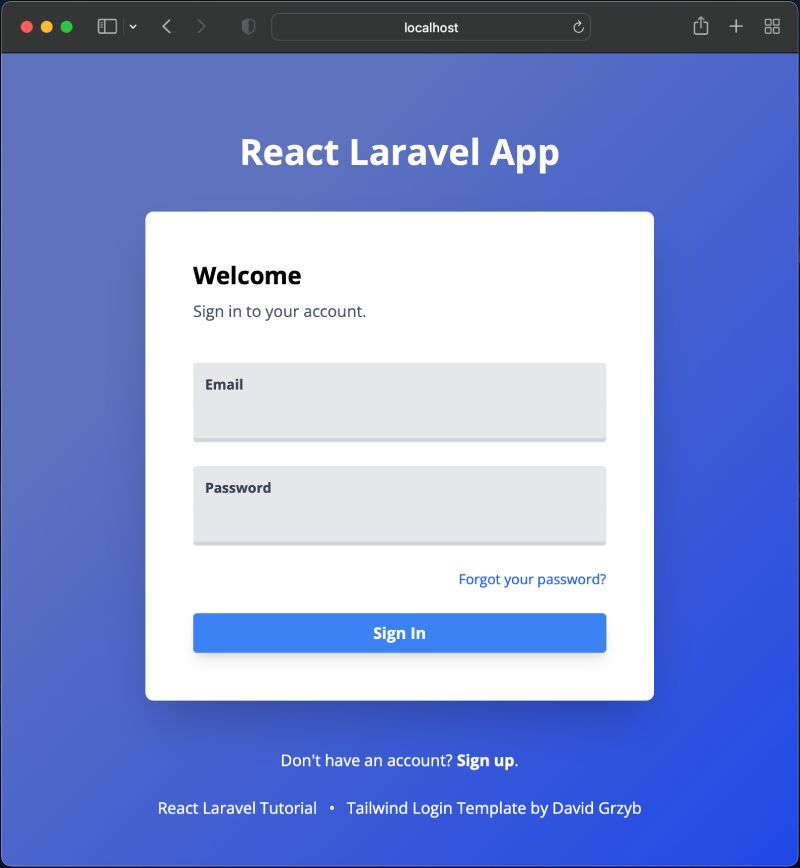
# until you stop Laravel Sail (control + "c")When it is complete, you can go to http://localhost/ in your browser and it will look like this:
Fix Potential Laravel Install Issue:
“Cannot start service MySQL: Ports are not available”
If you have ever installed another virtual environment or MySQL database on your local computer, you may run into something else using the 3306 MySQL port. I fixed this with these steps.
- In the “react-laravel” folder find and open the “docker-compose.yml” file in your IDE.
- Search for “{FORWARD_DB_PORT:-3306}” and change to “{FORWARD_DB_PORT:-3307}”
- Within your terminal app, go into your “react-laravel” folder.
- Run “./vendor/bin/sail up” and let it load.
- Go to http://localhost/ in your browser.
Your “docker-compose.yml” will look like this.
    mysql:
        image: "mysql/mysql-server:8.0"
        ports:
            - "${FORWARD_DB_PORT:-3307}:3306"
Migrate/Populate the MySQL Laravel Database
Next, we will use the terminal panel in VS Code. You may also use another tab in your terminal app of choice.
- Open your “react-laravel” folder in VS Code.
- View the terminal within VS Code.
– either go to “View” in the main menu, then “Terminal”
– or hold down the “control” key and the “`” key. - Run the following command line code.
./vendor/bin/sail artisan migrateWe can now take a look at the database.
View MySQL Data In Sequel Ace
- Open Sequel Ace.
- Add the following settings to the TCP/IP connection form:
– Name: (the nickname you’d like to give this connection)
– Host: 127.0.0.1
– Username: sail (this is the default when launching Laravel sail; located in your .env file)
– Password: password (also the default; this will be in your Laravel .env file)
– Database: (leave blank)
– Port: 3306 (or if you changed the port during troubleshooting then 3307)
- And click “Connect”.
- You should be able to select the “react_laravel” database and see the initial tables.
Now that our backend is prepared, let’s get the tools we need for our frontend.
Install React 18, Redux, & Tailwind
Now the react 18 tutorial portion begins.
Inside the Terminal app within VS Code, run this code:
npm install
npm install --save-dev react react-dom
npm install --save-dev @reduxjs/toolkit
npm install --save-dev tailwindcss postcss autoprefixer
npx tailwindcss init
npm run watch
Doing this will…
- Install all dependencies from “package.json”
- Install React, React-dom, and Redux toolkit and Tailwind CSS.
– it will add them to the “devDependencies” in package.json
– but it will NOT add them to production dependencies because we only need the compiled build files for production. - Then automatically watch for changed files and use Laravel Mix to build compiled JS and CSS files.
When it is complete, you will see this:
With our frontend environment set up, we can begin building in React.
Create a React Component
Within the “/react-laravel/” root folder, create the following under “resources/js”:
- a new folder “/resources/js/components“
- a new file “/resources/js/components/Welcome.js“
It should look something like this when you are done:
Within the “Welcome.js” file, enter this content.
(JSX login form adapted from Tailwind template by David Grzyb)
import React from "react";
import { createRoot } from "react-dom/client";

export default function Welcome() {
    return (
        <>
            <header className="max-w-lg mx-auto">
                <h1 className="text-4xl font-bold text-white text-center">
                    React Laravel App
                </h1>
            </header>

            <main className="bg-white max-w-lg mx-auto p-8 md:p-12 my-10 rounded-lg shadow-2xl">
                <section>
                    <h3 className="font-bold text-2xl">Welcome</h3>
                    <p className="text-gray-600 pt-2">
                        Sign in to your account.
                    </p>
                </section>

                <section className="mt-10">
                    <form className="flex flex-col" method="POST" action="#">
                        <div className="mb-6 pt-3 rounded bg-gray-200">
                            <label
                                className="block text-gray-700 text-sm font-bold mb-2 ml-3"
                                htmlFor="email"
                            >
                                Email
                            </label>
                            <input
                                type="text"
                                id="email"
                                className="bg-gray-200 rounded w-full text-gray-700 focus:outline-none border-b-4 border-gray-300 focus:border-blue-600 transition duration-500 px-3 pb-3"
                            />
                        </div>
                        <div className="mb-6 pt-3 rounded bg-gray-200">
                            <label
                                className="block text-gray-700 text-sm font-bold mb-2 ml-3"
                                htmlFor="password"
                            >
                                Password
                            </label>
                            <input
                                type="password"
                                id="password"
                                className="bg-gray-200 rounded w-full text-gray-700 focus:outline-none border-b-4 border-gray-300 focus:border-blue-600 transition duration-500 px-3 pb-3"
                            />
                        </div>
                        <div className="flex justify-end">
                            <a
                                href="#"
                                className="text-sm text-blue-600 hover:text-blue-700 hover:underline mb-6"
                            >
                                Forgot your password?
                            </a>
                        </div>
                        <button
                            className="bg-blue-500 hover:bg-blue-700 text-white font-bold py-2 rounded shadow-lg hover:shadow-xl transition duration-200"
                            type="submit"
                        >
                            Sign In
                        </button>
                    </form>
                </section>
            </main>

            <div className="max-w-lg mx-auto text-center mt-12 mb-6">
                <p className="text-white">
                    Don't have an account?{" "}
                    <a href="#" className="font-bold hover:underline">
                        Sign up
                    </a>
                    .
                </p>
            </div>

            <footer className="max-w-lg mx-auto flex justify-center text-white">
                <a
                    href="https://webprogrammer.io/site/react-laravel-tutorial-intro/"
                    className="hover:underline"
                    target="_blank"
                >
                    React Laravel Tutorial
                </a>
                <span className="mx-3">•</span>
                <a
                    href="https://davidgrzyb.com/"
                    className="hover:underline"
                    target="_blank"
                >
                    Tailwind Login Template by David Grzyb
                </a>
            </footer>
        </>
    );
}

if (document.getElementById("root")) {
    const root = createRoot(document.getElementById("root"));
    root.render(<Welcome />);
}
Now adjust the “/resources/js/app.js” file to include this component.
require("./bootstrap");

// ADD this line
require("./components/Welcome");
Add two lines of code in the root file “webpack.mix.js” so it will process React code and Tailwind CSS.
const mix = require("laravel-mix");

mix.js("resources/js/app.js", "public/js")
    // ADD this line
    .react()
    .postCss("resources/css/app.css", "public/css", [
        // ADD this line
        require("tailwindcss")
    ]);
Then, adjust your “tailwind.config.js” to look like this.
module.exports = {
    content: [
        "./resources/**/*.blade.php",
        "./resources/**/*.js",
        "./resources/**/*.vue",
    ],
    theme: {
        extend: {},
    },
    plugins: [],
};
Call The React Component In A Laravel Blade
Replace the default blade content here “/resources/views/welcome.blade.php” with this code:
<!DOCTYPE html>
<html lang="{{ str_replace('_', '-', app()->getLocale()) }}">
    <head>
        <meta charset="utf-8">
        <meta name="viewport" content="width=device-width, initial-scale=1">
        <title>React Laravel</title>
        <!-- use Tailwind CSS -->
        <link href="https://cdnjs.cloudflare.com/ajax/libs/tailwindcss/2.2.19/tailwind.min.css" rel="stylesheet">
        <!-- Using Google Fonts -->
        <link rel="preconnect" href="https://fonts.googleapis.com">
        <link rel="preconnect" href="https://fonts.gstatic.com" crossorigin>
        <link href="https://fonts.googleapis.com/css2?family=Open+Sans:ital,wght@0,400;0,700;1,400;1,700&display=swap" rel="stylesheet">
        <!-- Add some minor styling -->
        <style>
          * { font-family: "Open Sans", arial, helvetica; }
          .body-bg {
            background-color: #2149e8;
            background-image: linear-gradient(315deg, #2149e8 0%, #5f72be 74%);
          }
        </style>
    </head>
    <body class="body-bg min-h-screen pt-12 md:pt-20 pb-6 px-2 md:px-0">
      <div id="root"></div>
    </body>
    <!-- Call our app script -->
    <script src="{{ asset('js/app.js') }}" defer></script>
</html>
Notice that the only body HTML is “<div id=”root”></div>“. All other HTML will be generated by React.
As you save each file, Laravel Mix will compile everything to a working version.
Go to http://localhost/ and you will see the start of our app.
A Note About Javascript Debugging
While you save Javascript files and with “npm run watch” running, you may type bad code from time to time and it will not compile correctly. Here are a few tips on fixing it.
Step 1: Using Syntax Highlighting
In “/resources/js/components/Welcome.js” I will introduce an error by changing code on line 6 from “}}” to a single “}” and save the file. My VS Code window will look like this:
When we mouse over the red line under “</div>” we will see a tooltip message that will help us hunt down the problem:
Step 2: View Laravel Mix Compiling Errors
If we cannot locate the error via syntax highlighting, sometimes the error will come through during the auto compiling we have enabled like this:
Step 3: Use Chrome’s Inspect Panel
Sometimes there will be no syntax or compiling problem, but the app will still break. Often you can open the “Inspect” panel and go to the “Console” tab to find what the error is.
However, I will fix the missing “}” and we will continue.
Compile & Upload To Github
- Within the VS Code Terminal panel, stop “npm run watch” by holding down “control” + “C”.
- Then type and run “npm run prod”.
This will produce a compiled version of your project’s JS and CSS.
- Create a Github account.
- Then use the “Create A Git Repository” steps in the Git Commands Cheat Sheet to:
– create a repo
– and push your code.
# go to the location of your script
# initialize git within your application folder
$ cd /your/folder/dir/your-script
$ git init

# add all your initial files
# make a commit with a comment
$ git add .
$ git commit -m "initial commit"

# set the offsite location where your repo is stored
# then doublecheck that your remote location set corectly
$ git remote add origin https://github.com/(YOUR GITHUB REPO PATH)
$ git remote -v

# push the local commit to your master branch
$ git push --set-upstream origin master

# create and switch to a new branch
# (DO NOT work out of the "master" branch)
# verify you are on the dev branch
$ git branch -b dev
$ git branch -a

# push that branch to the remote repo
$ git push --set-upstream origin dev
Prep The Hosting Environment
You need these resources from your host. If you run into trouble, reach out to your web host’s support or your company’s database administrator.
- Create a MySQL database on your host.
– Examples: Hostinger, Bluehost, Siteground.
– Keep your DB name, user, and password on hand for later use. - Set up your domain or subdomain.
– set up Laravel on a subdomain on Hostinger - Get SSH access from your host.
– Examples: Hostinger, Bluehost, Siteground
– There may be other steps based on your host or your company.
– Consult your host or database admin.
Deploy Laravel 9
Log into your host via SSH and complete these steps.
# In your terminal app, log into your web host via SSH.
# (The ssh format may vary based on host)
$ ssh (username)@(hostname or IP address)

# Navigate to and/or create your Laravel app folder
$ cd /your/folder/structure
$ mkdir react-laravel
$ cd react-laravel

# clone your repo into the folder
# (remember the period at the end)
# then switch to your local "dev" branch
$ git clone https://github.com/(your-repo-path) .
$ git checkout dev
$ git pull

# begin installing and initial setup
$ composer install
$ cp .env.example .env
$ php artisan key:generate

# Edit your .env file
$ vi .env
Edit your .env file
# begin editing the file by pressing the "i" key.

# modify these variables with your host values
APP_ENV=production
APP_DEBUG=false
APP_URL="http://yourwebsite.com"
DB_CONNECTION=mysql
DB_HOST="YOUR_DATABASE_SERVER"
DB_PORT=3306
DB_DATABASE="YOUR_DATABASE_NAME"
DB_USERNAME="YOUR_DATABASE_USER"
DB_PASSWORD="YOUR_DATABASE_PASSWORD"

# Once you are done, press the "ESC" key,
# type ":wq" and hit enter/return
Migrate your database
// use Laravel to populate your database
$ php artisan migrate
Other Laravel Install Considerations
There may be other steps to get Laravel to work on your server. Here are a few I can think of.
- Changing the “public” folder to “public_html”
- Installing Laravel on a subdomain
- How to Install Laravel on Ubuntu
Final Result!
Congratulations. We have now created, integrated, and deployed a Laravel React project. Of course, the functionality is limited: it displays a login form using a React component. However, we will expand on this in future tutorials.
- View the live version.
- View the Github repository (react-laravel repo > 01-install branch)
