
This step-by-step Laravel Queue Example removes the guesswork of getting started.
Laravel Queues allow you to schedule tasks on the fly. This enables tasks to run in the background and improves Laravel’s performance.
Intro Notes:
- The completed code for this tutorial is at Laravel Queue Example on Github.
- This guide is modified, streamlined, and updated to Laravel 9 from “Laravel Queues Step By Step Guide” article on LaraShout.
- This guide uses Laravel Sail.
– Laravel Sail lines look like…./vendor/bin/sail artisan cache:clear
– If you do not use Sail, you may use…php artisan cache:clear
Laravel Queue Example: Create An Email Job
Install Laravel 9 with Laravel Sail
Staring off, run the following in your command line terminal.
If you have Laravel installed, then skip this section.
# go into your folder of choice
cd /MyFolder/MyProjects/

# install Laravel
# (this will run awhile and ask for your password)
curl -s "https://laravel.build/laravel-queue-example" | bash

# go into the application folder
cd laravel-queue-example

# start the application
# (it will run awhile again)
./vendor/bin/sail up
Fix Potential Laravel Sail / Docker Issue:
“Cannot start service MySQL: Ports are not available”
If you run into this error, try this fix.
- In the application folder, open the “docker-compose.yml” file in your IDE.
- Search for “{FORWARD_DB_PORT:-3306}” and change the line:
– before:'${FORWARD_DB_PORT:-3306}:3306'
– after:'${FORWARD_DB_PORT:-3307}:3306' - Within your terminal app, go into your application folder.
- Run this command and let it load.
./vendor/bin/sail up - Go to http://localhost/ in your browser.
Modify the .env file & prep your environment
First up, edit your .env file to control the queue with your database.
In addition, you can set your email values at this time.
# edit .env

# set your queue option
QUEUE_CONNECTION=database

# set your smtp values
# (optional ... but recommended)
MAIL_MAILER="smtp"
MAIL_HOST="smtp.yourhost.com"
MAIL_PORT="465"
MAIL_USERNAME="[email protected]"
MAIL_PASSWORD="yourpassword"
MAIL_ENCRYPTION="SSL/TLS"
MAIL_FROM_ADDRESS="[email protected]"
MAIL_FROM_NAME="Your Name at ${APP_NAME}"
Update your Laravel config timezone.
// file: /config/app.php

  "timezone" => "America/Chicago",
Now open your command line and install Carbon for date and time values.
# install Carbon
./vendor/bin/sail composer require nesbot/carbon
Refresh Laravel to make sure the new settings take effect.
# clear the cache
./vendor/bin/sail artisan cache:clear
Add The Queue Basics
In the command line, you may create a new queue database table and migrate it.
Luckily, Laravel handles the database table structure so we don’t need to design it ourselves.
# create new queue table
# (we only need to create this table once)
./vendor/bin/sail artisan queue:table
./vendor/bin/sail artisan migrate
Next, generate a new queue job type.
# make a queue job
# (you create new jobs for every type of queue task type)
./vendor/bin/sail artisan make:job SendTestEmail
Set Up A Laravel Mailable
In order to set up a task for the queue, create a Laravel Mailable.
# make an email template
./vendor/bin/sail artisan make:mail TestEmail

# create an email blade view
mkdir ./resources/views/mail
touch ./resources/views/mail/test.blade.php
Once you create the Laravel blade, add some content to it.
<!-- file: /resources/views/mail/test.blade.php -->

<table border="0" cellpadding="0" cellspacing="0">
  <tr>
    <td style="
      padding: 2em;
      margin: 2em;
      font-family:'Lucida Sans', 'Lucida Sans Regular', 'Lucida Grande', 'Lucida Sans Unicode', Geneva, Verdana, sans-serif;
      border: 2px solid #ddd;
    ">
      <h1>Testing testing...</h1>
      <p>The "Laravel Queue Example" sent this test email.</p>
    </td>
  </tr>
</table>
Next, modify the “TestEmail” class to use the new view.
<?php
// file: /app/Mail/TestEmail.php

namespace App\Mail;

use Illuminate\Bus\Queueable;
use Illuminate\Contracts\Queue\ShouldQueue;
use Illuminate\Mail\Mailable;
use Illuminate\Queue\SerializesModels;

class TestEmail extends Mailable
{
  use Queueable, SerializesModels;

  /**
   * Create a new message instance.
   *
   * @return void
   */
  public function __construct($data = [])
  {
    // modify the construct to send additional data
    $this->data = (object) $data;
  }

  /**
   * Build the message.
   *
   * @return $this
   */
  public function build()
  {
    $message = $this->subject($this->data->subject)
      ->from($this->data->from_email, $this->data->from_name)
      ->view("mail.test");
    return $message;
  }
}
Modify The Laravel Queue Example Job
After that, modify the “SendTestMail” queue job.
A small aside on how this class will be used:
- We create the “SendTestEmail” class.
- Later when a new “SendTestEmail” object is created or used…
- …the email WILL NOT be immediately sent out.
- Instead, the object can be created, BUT…
- … the email will not be sent until the SendTestEmail->handle() is called.
// file: /app/Jobs/SendTestEmail.php

namespace App\Jobs;

use App\Libraries\Mail as LibrariesMail;
use Illuminate\Bus\Queueable;
use Illuminate\Contracts\Queue\ShouldBeUnique;
use Illuminate\Contracts\Queue\ShouldQueue;
use Illuminate\Foundation\Bus\Dispatchable;
use Illuminate\Queue\InteractsWithQueue;
use Illuminate\Queue\SerializesModels;

use Illuminate\Support\Facades\Mail;
use App\Mail\TestEmail;
use Throwable;
use Carbon\Carbon;

class SendTestEmail implements ShouldQueue
{
  use Dispatchable, InteractsWithQueue, Queueable, SerializesModels;

  /**
   * Create a new job instance.
   *
   * @return void
   */
  public function __construct()
  {
    //
  }

  /**
   * Execute the job.
   *
   * @return void
   */
  public function handle()
  {
    try {
      // set email values
      $timestamp = Carbon::now(config("app.timezone"))->toDateTimeString();
      $to_email = "[email protected]";
      $mail_data = [
        "subject" => "test email sent at $timestamp",
        "from_email" => env("MAIL_FROM_ADDRESS"),
        "from_name" => env("MAIL_FROM_NAME"),
      ];

      // create our mail object
      $email_object = new TestEmail($mail_data);

      // send the email message
      Mail::to($to_email)->send($email_object);
    } catch (Throwable $th) {
      // output an error
      echo "<pre>Throwable: " . print_r($th) . "</pre>\n";
    }
  }
}
Add A Route To Test Our Laravel Queue Example
Create a queue jobs controller.
./vendor/bin/sail artisan make:controller JobsControllerThen add a browser-accessible web route that we can trigger.
Note, Laravel Routing syntax changes based on version. Double-check your route.
// file: /routes/web.php

use App\Http\Controllers\JobsController;
use Illuminate\Support\Facades\Route;

Route::controller(JobsController::class)->group(function () {
  Route::get("/test-email", "process_queue");
});
Dispatch The Job With Laravel Queue Delay
Proceeding on, define what happens in that controller method/function.
// file: /app/Http/Controllers/JobsController.php

namespace App\Http\Controllers;

use Illuminate\Http\Request;
use Carbon\Carbon;
use App\Jobs\SendTestEmail;

class JobsController extends Controller
{
  public function process_queue()
  {
    $carbon_object = Carbon::now(config("app.timezone"))->addMinutes(10);
    $timestamp = $carbon_object->toDateTimeString();
    SendTestEmail::dispatch()->delay($carbon_object);
    echo "
      <p style=\"
        padding: 2em; margin: 2em; border: 4px solid #ddd;
        border-radius: 0.5em;
        font-family: sans-serif; font-weight: bold;
        font-size: 1.5em; color: #777;
      \">
        We scheduled an email at $timestamp.
      </p>
    \n";
  }
}
At this point, we can visit http://localhost/test-email in our browser and we’ll see this:
View the Laravel Queue Example MySQL Jobs
Download, install and open Sequel Ace.
Add the following settings to the TCP/IP connection form:
- Name: (the nickname you’d like to give this connection)
- Host: 127.0.0.1
- Username: sail (this is the default when launching Laravel sail; located in your .env file)
- Password: password (also the default; this will be in your Laravel .env file)
- Database: (leave blank)
- Port: 3306 (or if you changed the port during troubleshooting then 3307)
It will look something like this:
Once you log in, navigate to your database and the “jobs” table to view schedule jobs data.
I triggered my “/test-email” URL multiple times and see this.

Execute The Queue
We have jobs in our database and can run the queue.
Run this command in your terminal.
./vendor/bin/sail artisan queue:workWhile the queue runs, you’ll see the queue being processed.
Note: The “queue:work” will continuously run until you cancel it (CRTL + C).
Then when you go back to the database, the queue cleared all the rows.
Finally, check your inbox for your sample email message.
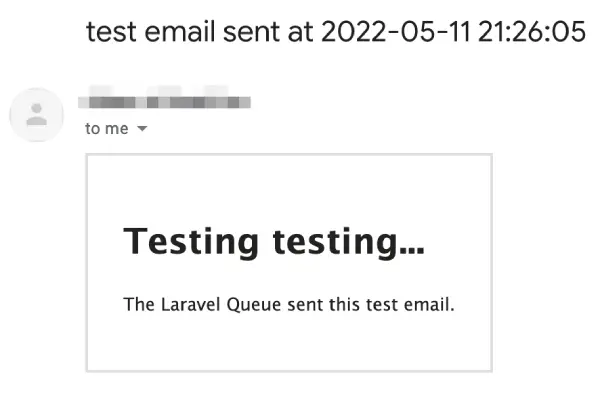
Congratulations! You have a working Laravel Queue example!
Deploying Laravel Queue in Production
We ran our queue locally, but there are a few steps to run our queue in Production.
(Adapted from Using laravel Queues on shared hosting: A simple guide.)
First, add a scheduling task to “app/console/Kernel.php”.
// file: app/Console/Kernel.php

    protected function schedule(Schedule $schedule)
    {
        // run every minute
        $schedule
            ->command("queue:work --tries=3")
            ->timezone(config("app.timezone"))
            ->cron("* * * * * *")
            ->withoutOverlapping();
    }
Second, create a crontab job either in your control panel or via the command line:
* * * * * php /path-to-project/artisan schedule:run >> /dev/null 2>&1Hooray! You set up this Laravel queue example on your production server.